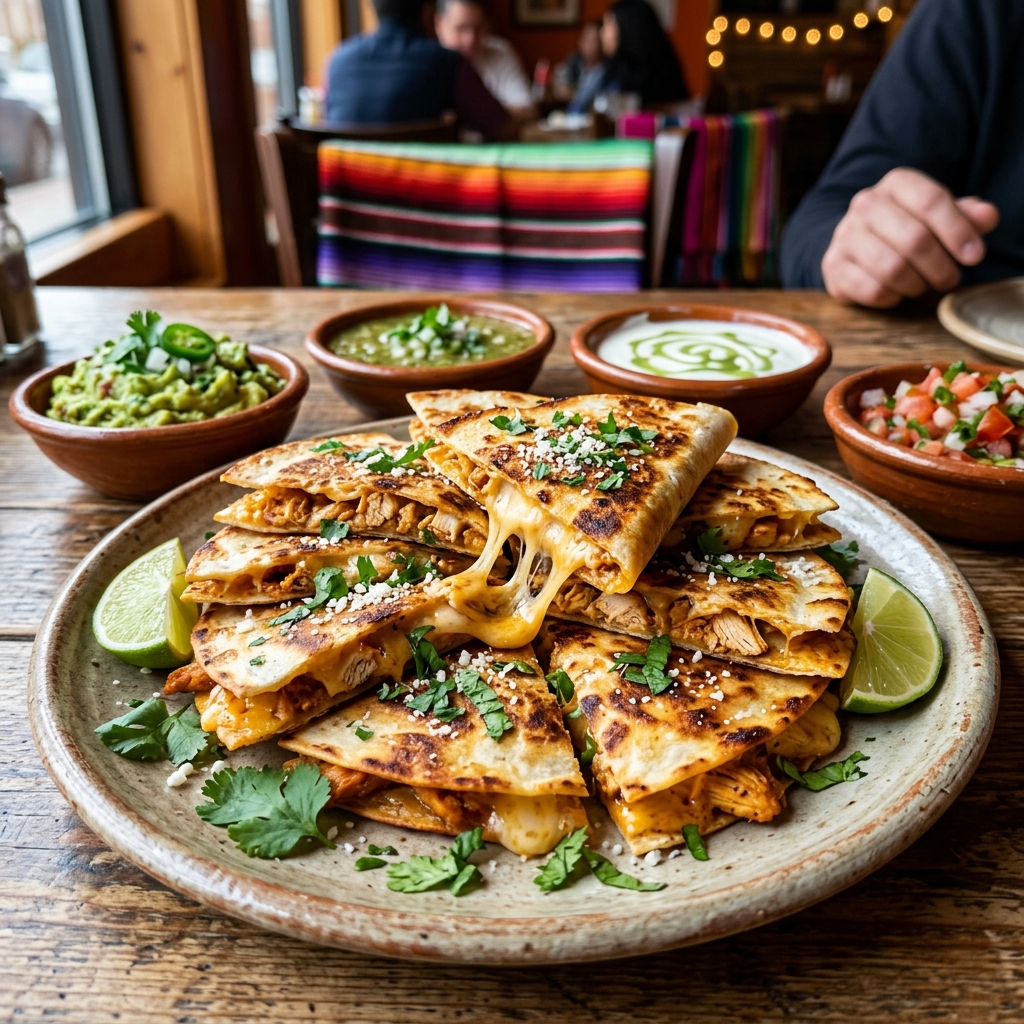
Mini Chicken Quesadillas (Crispy Skillet Cantina Masterclass)
The ultimate cantina masterclass for golden, crunchy Mini Chicken Quesadillas. Master street-taco tortilla crisping, shredded cumin-lime chicken seasoning, and the dual-cheese melting envelope that keeps the filling juicy.
Key Takeaways
- ✓Use street-taco size tortillas and fold into half-moons rather than stacking two tortillas for easier flipping.
- ✓Form a 'cheese sandwich' around the chicken (cheese-chicken-cheese) to glue the tortilla shut as it melts.
- ✓Sear in clarified butter or light oil over medium heat to achieve a blistered, golden-crisp shell without burning.
- ✓Drain all excess salsa liquid from the shredded chicken mixture to prevent soggy, steamed tortillas.
The Story
The quesadilla is an ancient Mesoamerican culinary creation with roots dating back centuries to the indigenous populations of central and southern Mexico, who folded freshly pressed corn masa tortillas around native squash blossoms, chiles, and wild game over clay comals. Following the Spanish introduction of dairy cattle to Oaxaca in the 16th century, stringy, melt-in-your-mouth quesillo (Oaxaca cheese) became the beating heart of the modern quesadilla.
In contemporary Tex-Mex and American cantina culture, the quesadilla was often inflated into giant, floppy 12-inch flour tortilla monstrosities that were greasy, difficult to eat, and prone to spilling their contents upon the first bite.
The modern chef’s answer is the Mini Cantina Quesadilla. By scaling down to 4.5-inch street taco tortillas and adopting the single-tortilla half-moon fold, we create individual, hand-held delights with an exponentially higher crust-to-filling ratio. Every square inch of the tortilla undergoes direct conductive heat against a hot cast iron skillet, transforming into a shatteringly crisp, blistered golden shell that holds an intensely seasoned, molten cheesy center.
This masterclass elevates the mini quesadilla into an architectural triumph of texture and flavor. By understanding starch dehydration, lipid barriers, and cheese melting curves, you will master the art of turning simple shredded chicken and cheese into craveable street-food perfection.
The Science of Flavor Chemistry & Thermal Dynamics
Achieving the perfect crisp quesadilla without greasy sogginess requires understanding starch dehydration and cheese fat binding.
1. The Half-Moon Structural Seal (The Cheese Matrix)
When making quesadillas by stacking two flat tortillas on top of each other, flipping the sandwich in a skillet frequently causes the top tortilla to slide off, scattering ingredients. By folding a single small tortilla in half over the filling, the folded spine creates an unbroken mechanical hinge. Furthermore, we employ the triple-layer cheese weld:- Bottom layer of shredded cheese against the warm tortilla.
- Seasoned shredded chicken in the center.
- Top layer of shredded cheese.
2. Dextrinization & Tortilla Moisture Management
Tortillas contain starches that undergo dextrinization (the breakdown of starch into smaller sweet and nutty carbohydrate chains) when heated in contact with fat at temperatures between 325°F and 350°F (163°C–177°C). If the filling contains watery salsa or wet boiled chicken, that water converts into steam that pushes through the tortilla pores, preventing dextrinization and turning the exterior rubbery. By thoroughly draining the chicken and salsa before filling, moisture stays trapped inside the cheese emulsion while the outer starch crisps to perfection.3. Butter vs Oil: The Clarified Butter Advantage
Regular butter contains 16% to 18% water and milk solids that burn quickly at high heat, leaving black bitter specks on the tortilla. Cooking oil provides high heat but lacks buttery flavor. The masterclass secret is clarified butter (ghee) or a 50/50 blend of butter and avocado oil. This allows you to fry at 350°F without scorching, imparting a golden brioche-like aroma and an auditory crunch.4. Thermal Expansion & Steam Release Dynamics
As the cheese melts and reaches 160°F, water vapor within the shredded chicken expands. If the quesadilla is sealed completely around all edges, pressure builds up, ballooning the tortilla and pushing it away from the hot skillet surface, causing uneven browning. To prevent this, our technique leaves microscopic steam vents along the curved outer seam. The venting allows excess steam to escape while the melted cheese caramelizes into crispy cheese crisps (frico) wherever it touches the hot metal.Essential Equipment & Thermal Calibration
- The Cast Iron Skillet or Heavy Comal: A 12-inch seasoned cast iron skillet or carbon steel griddle is essential. These heavy pans retain thermal mass, ensuring the pan does not drop in temperature when cold quesadillas are introduced.
- Wide Fish Spatula or Offset Turner: A thin, flexible stainless steel spatula allows you to slide under delicate, blistered tortillas without tearing the shell.
- Wire Cooling Rack: Resting cooked quesadillas on an elevated wire rack prevents condensation from softening the crunchy underside.
Anatomy of the Ingredients & Artisanal Sourcing
Carefully selected ingredients distinguish masterclass cantina quesadillas from standard home snacks:
- The Tortilla Choice: Look for street taco-sized (4.5 to 5-inch) tortillas. Brands offering a 50/50 blend of corn and flour (like La Tortilla Factory or El Milagro) offer the ideal balance: the nutty toasted-corn flavor of masa paired with the flexible, non-cracking pliability of wheat flour.
- The Cheese Duet: Never use pre-shredded cheese coated in anti-caking cellulose. Shred a block of Monterey Jack (for velvety, long-stretch meltability) combined with sharp white cheddar or authentic Mexican Queso Oaxaca.
- The Seasoned Shredded Chicken: Use shredded roasted chicken breast or thighs. Toss the warm meat with freshly toasted ground cumin, smoked chili powder, dried Mexican oregano, and a splash of fresh lime juice so the meat itself is vibrant and punchy.
- The Salsa Reduction: Always drain fire-roasted salsa through a fine mesh sieve before combining with meat. You want the rich concentrated tomato flesh, charred garlic, and jalapeño bits without the watery juice.
Step-by-Step Culinary Masterclass
Step 1: Chicken Seasoning & Moisture Extraction
In a medium mixing bowl, combine 2.5 cups of warm shredded chicken breast with 1 tsp toasted ground cumin, 1 tsp smoked chili powder, 1/2 tsp Mexican oregano, 1/2 tsp garlic powder, and 1/2 tsp sea salt. Drizzle with 1 tbsp fresh lime juice. Add 1/3 cup of thoroughly drained fire-roasted salsa. Toss with two forks until every shred of chicken is infused with seasoning and crimson spice oils.
- Chef's Technique Tip: Tossing warm chicken with spices allows the fat-soluble flavor molecules in cumin and chili powder to dissolve into the poultry fats immediately.
- Sensory Checkpoint: Vibrantly seasoned, glistening shredded chicken with zero pooling water at the bottom of the bowl.
Step 2: Dual-Cheese Grating & Homogenization
Take 1.5 cups of block Monterey Jack cheese and 1 cup of block sharp Cheddar or Queso Oaxaca. Grate both on the large teardrop holes of a box grater. Toss the shreds together in a clean bowl to create a uniform blend.
- Chef's Technique Tip: Cold cheese grates into clean shreds without gumming up the grater blades.
- Sensory Checkpoint: A light, fluffy mountain of dual-colored shredded cheese ready for layering.
Step 3: Tortilla Conditioning & Flexibility Activation
Stack the 8 street taco tortillas inside a damp paper towel. Microwave on high for 20 seconds, or heat each tortilla individually on a dry skillet for 10 seconds per side until steaming and completely pliable.
- Chef's Technique Tip: Heating plasticizes the starch polymers in the tortilla, preventing the spine from splitting when folded.
- Sensory Checkpoint: Pliable, warm tortillas that drape softly over your fingers without cracking.
Step 4: The Triple-Layer Architecture Assembly
Lay 4 warm tortillas flat on your prep board. On one half of each tortilla, layer: 1) 2 tablespoons of mixed cheese, 2) 2 tablespoons of seasoned shredded chicken, and 3) 2 more tablespoons of cheese. Leave a clean 1/4-inch border around the curved edge.
- Chef's Technique Tip: The cheese sandwich surrounding the chicken acts as an adhesive glue when melted, locking the filling in place.
- Sensory Checkpoint: Four half-tortillas stacked with neat layers of cheese, chicken, and top cheese.
Step 5: The Half-Moon Fold & Air Evacuation
Gently fold the empty tortilla half over the filling, creating a half-moon shape. Press down gently with the flat of your palm to compact the layers and gently push out any trapped air.
- Chef's Technique Tip: Gentle compression establishes internal contact so the cheese melts quickly and evenly.
- Sensory Checkpoint: Four compact, level half-moon packets ready for the hot skillet.
Step 6: Skillet Preheating & Fat Calibration
Heat your 12-inch cast iron skillet over medium heat for 4 minutes until the metal reaches 340°F–350°F (170°C–177°C). Add 1 tablespoon of clarified butter or butter-oil blend. Swirl the skillet to coat the entire cooking surface with a shimmering, thin veil of golden fat.
- Chef's Technique Tip: Clarified butter has a 450°F smoke point, allowing deep browning without the burnt bitter flavor of milk solids.
- Sensory Checkpoint: A hot, shimmering skillet with faint aromatic ripples in the melted fat.
Step 7: The Conductive Golden Sear
Carefully place 3 to 4 folded quesadillas into the skillet with their straight folded spines facing the perimeter. Cook undisturbed over medium heat for 2.5 to 3 minutes. Press down lightly with a spatula during the first 30 seconds to maximize surface contact.
- Chef's Technique Tip: Resist shifting the quesadillas around; continuous metal contact is what creates shatteringly crisp micro-blisters.
- Sensory Checkpoint: A deep golden-brown, crackling underside with visible cheese melting along the seams.
Step 8: The Precision Flip & Secondary Sear
Slide your spatula under the curved open edge of each quesadilla and gently flip over. Cook the second side for 2 to 2.5 minutes, pressing lightly, until equally golden, rigid, and blistered.
- Chef's Technique Tip: Flipping toward the folded spine ensures the filling stays securely trapped inside.
- Sensory Checkpoint: Both faces are rigid, golden, and crisp, with melted cheese bubbling at the seam.
Step 9: Resting on the Wire Rack
Transfer the hot quesadillas directly from the skillet onto a wire cooling rack. Let rest for 90 seconds. Do not stack them.
- Chef's Technique Tip: Placing hot quesadillas directly on a flat plate traps steam beneath, instantly softening the crunchy bottom crust.
- Sensory Checkpoint: The quesadillas remain dry and crisp on both sides as internal molten cheese stabilizes.
Step 10: Bisection & Cantina Presentation
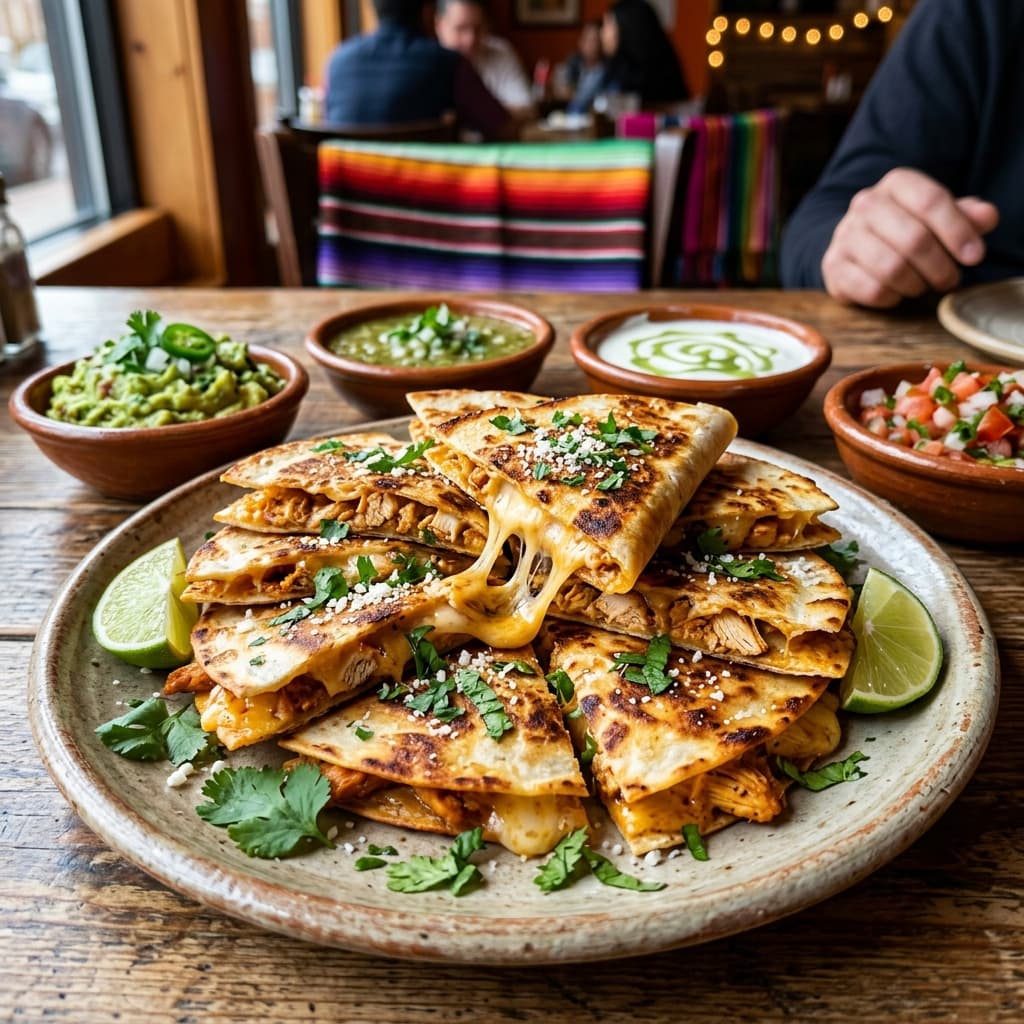
Transfer rested quesadillas to a cutting board. Using a sharp chef's knife or pizza wheel, cut each half-moon in half diagonally to form two triangular wedges (16 wedges total). Arrange radiating outward on a warm platter surrounding bowls of Mexican crema, fresh guacamole, and tangy salsa verde. Garnish with lime wedges.
- Chef's Technique Tip: Serve immediately while the cheese is molten and stretchy.
- Sensory Checkpoint: An enticing spread of golden, crunchy wedges with visible layers of seasoned chicken and cheese pulls.
Pro-Chef Troubleshooting & Critical Checkpoints
Problem: Tortilla Cracked Along the Fold Line
- The Root Cause: Tortillas were cold, stale, or dry when folded.
- The Masterclass Solution: Always wrap tortillas in a damp paper towel and microwave for 20 seconds before assembling to restore starch elasticity.
Problem: Tortilla Burned Before the Cheese Melted
- The Root Cause: Skillet was too hot (over 375°F), or cold filling straight from the fridge was used.
- The Masterclass Solution: Maintain medium heat (340°F) and ensure shredded chicken is warm or room temperature before assembling.
Problem: Quesadillas Turned Soggy After Cooking
- The Root Cause: Tortillas were stacked on a flat plate where steam collected, or watery salsa was not drained.
- The Masterclass Solution: Always drain salsa in a sieve, and rest cooked quesadillas in a single layer on an elevated wire cooling rack.
Problem: Filling Spilled Out into the Skillet During Flipping
- The Root Cause: Overfilled with chicken, or flipped clumsily from the open edge.
- The Masterclass Solution: Limit filling to 2 tablespoons of chicken and 4 tablespoons total cheese per taco, and flip towards the folded spine.
Macro Analysis & Nutritional Optimization
These mini quesadillas provide balanced athletic nutrition with high protein and controlled portions:
- 32 Grams of Lean Poultry Protein: Chicken breast supplies abundant dietary protein for cellular repair and muscle recovery without excess saturated fat.
- Bioavailable Calcium: Real Monterey Jack and Cheddar provide over 300mg of dietary calcium per serving to support bone density and muscle contraction.
- Controlled Carbohydrates: Utilizing small street taco tortillas limits carbs to just 28g per generous 2-quesadilla serving, making it vastly superior to massive restaurant burritos.
- Dietary Adaptations: Easily made 100% Gluten-Free by utilizing certified gluten-free pure white or yellow corn tortillas.
- Macro Profile per Serving (2 Mini Quesadillas): 420 kcal | 32g Protein | 28g Carbohydrates | 20g Fat.
Artisanal Serving & Pairing Architecture
Serve with authentic cantina accompaniments that balance richness with acidity:
- Traditional Mexican Dips:
- Cantina Sides: Authentic black beans with cotija cheese, or Mexican street corn (Elote) with chili powder.
- Beverages: Ice-cold Mexican beer with a lime wedge, an authentic fresh lime margarita, or sparkling mineral water (Topo Chico) with lime.
Scientific Storage, Meal Prep & Reheating Protocol
These mini quesadillas are exceptional for advance meal prep and freezer storage:
- Freezing Pre-Cooked Quesadillas: Assemble and cook completely. Let cool on a wire rack. Freeze in a single layer on a baking sheet, then transfer to a freezer bag for up to 3 months.
- Reheating Protocol:
Frequently Asked Questions (Masterclass Edition)
Q: Can I use corn tortillas instead of flour?
A: Yes! Corn tortillas deliver an authentic toasted-masa flavor. Warm them on a dry skillet first to make them pliable, and use a little extra butter or oil in the pan to achieve a golden, shatteringly crisp taco-quesadilla shell.Q: Can I make these in an air fryer directly?
A: Yes! Lightly brush both sides of assembled quesadillas with oil. Air-fry at 375°F (190°C) for 6 to 7 minutes, flipping at 4 minutes, until crispy and bubbly.Q: What is the best cheese for a true Mexican cheese pull?
A: Authentic Queso Oaxaca (Mexican string cheese) or Queso Asadero mixed with Monterey Jack delivers the ultimate stretchy, creamy cheese pull.Q: How do I prevent the filling from spilling out during flipping?
A: Keep a 1/4-inch border along the curved edge, press the quesadilla firmly with a spatula before flipping, and slide your spatula under the rounded edge toward the fold.Mini Chicken Quesadillas (Crispy Skillet Cantina Masterclass)
The ultimate cantina masterclass for golden, crunchy Mini Chicken Quesadillas. Master street-taco tortilla crisping, shredded cumin-lime chicken seasoning, and the dual-cheese melting envelope that keeps the filling juicy.
Macro Nutrition Profile (Per Serving)
Ingredients
Ingredient Substitutions
| Original Ingredient | Healthy Alternative |
|---|---|
| Chicken breast | Turkey breast or extra-firm tofu (1:1 ratio) |
| Dino kale/greens | Baby spinach or Swiss chard (cooks faster, add at the end) |
Instructions
Chicken Seasoning & Moisture Extraction: In a medium mixing bowl, combine 2.5 cups of warm shredded chicken breast with 1 tsp toasted ground cumin, 1 tsp smoked chili powder, 1/2 tsp Mexican oregano, 1/2 tsp garlic powder, and 1/2 tsp sea salt. Drizzle with 1 tbsp fresh lime juice. Add 1/3 cup of thoroughly drained fire-roasted salsa. Toss with two forks until every shred of chicken is infused with seasoning and crimson spice oils. Chef's Technique Tip: Tossing warm chicken with spices allows the fat-soluble flavor molecules in cumin and chili powder to dissolve into the poultry fats immediately. Sensory Checkpoint: Vibrantly seasoned, glistening shredded chicken with zero pooling water at the bottom of the bowl.
Dual-Cheese Grating & Homogenization: Take 1.5 cups of block Monterey Jack cheese and 1 cup of block sharp Cheddar or Queso Oaxaca. Grate both on the large teardrop holes of a box grater. Toss the shreds together in a clean bowl to create a uniform blend. Chef's Technique Tip: Cold cheese grates into clean shreds without gumming up the grater blades. Sensory Checkpoint: A light, fluffy mountain of dual-colored shredded cheese ready for layering.
Tortilla Conditioning & Flexibility Activation: Stack the 8 street taco tortillas inside a damp paper towel. Microwave on high for 20 seconds, or heat each tortilla individually on a dry skillet for 10 seconds per side until steaming and completely pliable. Chef's Technique Tip: Heating plasticizes the starch polymers in the tortilla, preventing the spine from splitting when folded. Sensory Checkpoint: Pliable, warm tortillas that drape softly over your fingers without cracking.
The Triple-Layer Architecture Assembly: Lay 4 warm tortillas flat on your prep board. On one half of each tortilla, layer: 1) 2 tablespoons of mixed cheese, 2) 2 tablespoons of seasoned shredded chicken, and 3) 2 more tablespoons of cheese. Leave a clean 1/4-inch border around the curved edge. Chef's Technique Tip: The cheese sandwich surrounding the chicken acts as an adhesive glue when melted, locking the filling in place. Sensory Checkpoint: Four half-tortillas stacked with neat layers of cheese, chicken, and top cheese.
The Half-Moon Fold & Air Evacuation: Gently fold the empty tortilla half over the filling, creating a half-moon shape. Press down gently with the flat of your palm to compact the layers and gently push out any trapped air. Chef's Technique Tip: Gentle compression establishes internal contact so the cheese melts quickly and evenly. Sensory Checkpoint: Four compact, level half-moon packets ready for the hot skillet.
Skillet Preheating & Fat Calibration: Heat your 12-inch cast iron skillet over medium heat for 4 minutes until the metal reaches 340°F–350°F (170°C–177°C). Add 1 tablespoon of clarified butter or butter-oil blend. Swirl the skillet to coat the entire cooking surface with a shimmering, thin veil of golden fat. Chef's Technique Tip: Clarified butter has a 450°F smoke point, allowing deep browning without the burnt bitter flavor of milk solids. Sensory Checkpoint: A hot, shimmering skillet with faint aromatic ripples in the melted fat.
The Conductive Golden Sear: Carefully place 3 to 4 folded quesadillas into the skillet with their straight folded spines facing the perimeter. Cook undisturbed over medium heat for 2.5 to 3 minutes. Press down lightly with a spatula during the first 30 seconds to maximize surface contact. Chef's Technique Tip: Resist shifting the quesadillas around; continuous metal contact is what creates shatteringly crisp micro-blisters. Sensory Checkpoint: A deep golden-brown, crackling underside with visible cheese melting along the seams.
The Precision Flip & Secondary Sear: Slide your spatula under the curved open edge of each quesadilla and gently flip over. Cook the second side for 2 to 2.5 minutes, pressing lightly, until equally golden, rigid, and blistered. Chef's Technique Tip: Flipping toward the folded spine ensures the filling stays securely trapped inside. Sensory Checkpoint: Both faces are rigid, golden, and crisp, with melted cheese bubbling at the seam.
Resting on the Wire Rack: Transfer the hot quesadillas directly from the skillet onto a wire cooling rack. Let rest for 90 seconds. Do not stack them. Chef's Technique Tip: Placing hot quesadillas directly on a flat plate traps steam beneath, instantly softening the crunchy bottom crust. Sensory Checkpoint: The quesadillas remain dry and crisp on both sides as internal molten cheese stabilizes.
Bisection & Cantina Presentation: Transfer rested quesadillas to a cutting board. Using a sharp chef's knife or pizza wheel, cut each half-moon in half diagonally to form two triangular wedges (16 wedges total). Arrange radiating outward on a warm platter surrounding bowls of Mexican crema, fresh guacamole, and tangy salsa verde. Garnish with lime wedges. Chef's Technique Tip: Serve immediately while the cheese is molten and stretchy. Sensory Checkpoint: An enticing spread of golden, crunchy wedges with visible layers of seasoned chicken and cheese pulls.
Tried this recipe?
Let us know how it turned out! Click a star below to leave a review and rate the recipe.
Storage & Freezing Tips
- Refrigerator: Store leftovers in an airtight container for up to 3-4 days.
- Reheating: Heat in a saucepan or skillet on medium heat until hot throughout.
- Freezing: Freeze portions in airtight containers for up to 2 months. Reheat directly from frozen or after thawing.
Frequently Asked Questions
Can this recipe be prepared ahead of time?▼
Yes, this meal is excellent for weekly meal prep. Store components separately and assemble before serving.
Is this recipe gluten-free?▼
All ingredients used are naturally gluten-free. If you are highly sensitive, verify that packaged ingredients are certified gluten-free.
Tried this recipe?
Tag @stewartlucas on Instagram and hashtag it #nutriguide!
You Might Also Like
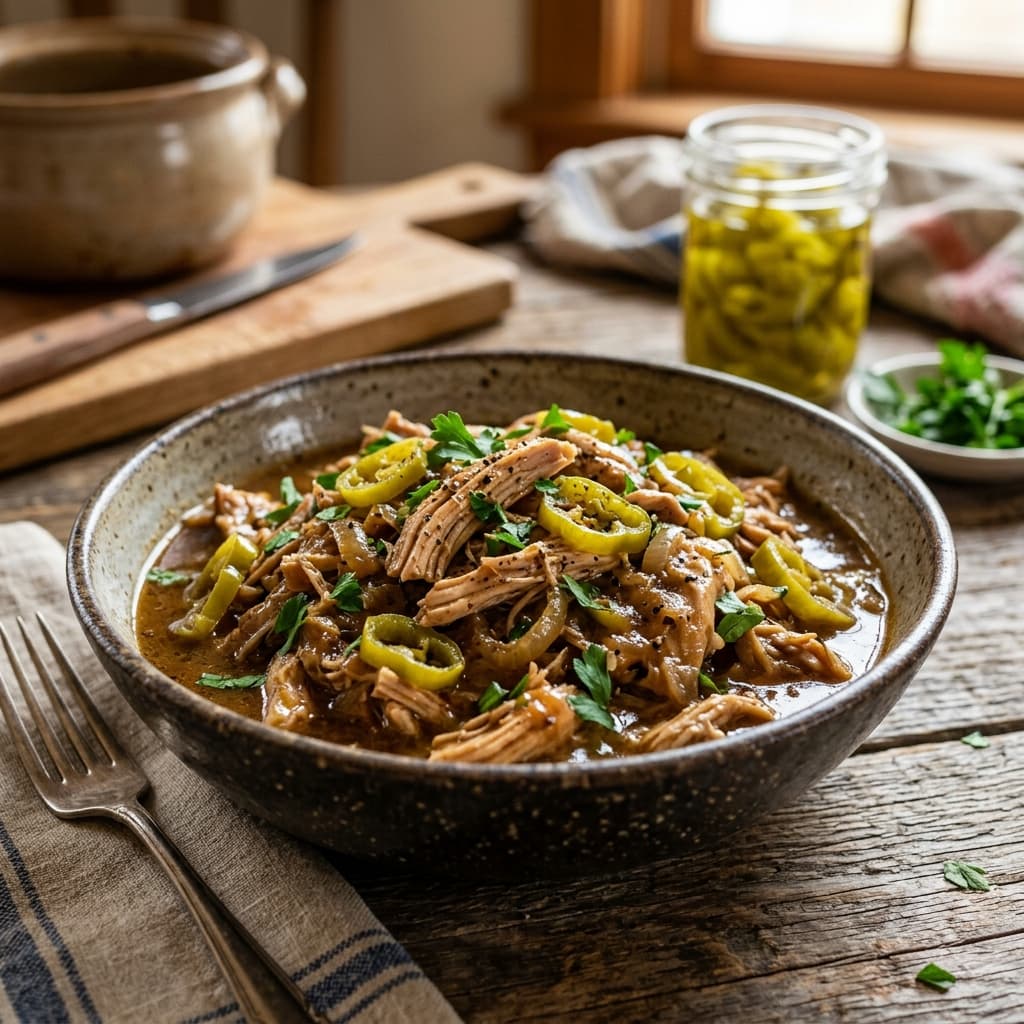
Slow Cooker Mississippi Chicken (Zesty Pepperoncini & Butter Braise Masterclass)

Stewart Lucas
Nutritionist & Recipe DeveloperStewart Lucas is a nutritionist and recipe developer representing the NutriGuide team. All recipes, nutritional values, and diet protocols published on this site are designed and audited by certified dietitians and clinical nutrition professionals to guarantee absolute accuracy.
Community Reviews
Please log in to leave a review.